A multi-line text object (or "paragraph") contains multiple lines of text that wrap to a new line when the edge of the text box is reached.
When text wraps from one line to the next, it is called a "line break." In Western languages, line breaks may occur at a space character or after a punctuation mark. However, languages such as Chinese, Japanese, and Korean have different line breaking rules. For paragraph text to use the correct line breaking rules, you must select the correct Script on the Advanced tab of the Font property page.
The General tab enables you to set the alignment, width, and indentation of the paragraph. A sample at the bottom of the page shows how your choices affect the formatting of the paragraph.
-
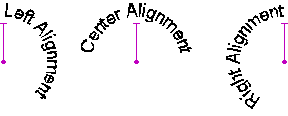
Alignment: Specifies the alignment of the text in the paragraph. Options include:
-
Left: The text is aligned along the left margin, and the right edge of the paragraph is ragged.
-
Center: The text is aligned along the middle so that both the left and right edges of the paragraph are ragged.
-
Right: The text is aligned along the right margin, and the left edge of the paragraph is ragged.
-
Justified: The spaces between words in the paragraph are adjusted so that the paragraph is aligned along both the left and right margins. The alignment of the last line of the paragraph is specified in the Orphan Alignment option.
-
Distributed: The spaces between characters in the paragraph are adjusted so that the paragraph is aligned along both the left and right margins for all lines of the paragraph.
-
Orphan Alignment: Specifies the alignment of a short line in a paragraph that does not take up an entire line. Typically, an "orphan" refers to the last line in a paragraph. When Justified alignment is used, the orphan alignment setting determines the alignment of any orphans in a paragraph. When Distributed alignment is used, the orphan alignment setting determines the alignment of any orphans only if the orphan contains a single word.
-
Paragraph Width: Specifies the width of each paragraph in the selected object.
 Opens the Paragraph Width dialog, where you can specify whether the text wraps within the object's defined width or whether the object automatically resizes to fit the width of the text.
-
Indentation: Specifies the type of indentation. Options include:
-
(none): Specifies no indentation.
-
First Line: Specifies that the first line of text in each paragraph is indented.
-
Hanging: Specifies that every line of text in a paragraph is indented except the first line.
For either First Line or Hanging, you can specify how far the text is indented.
The Auto Size feature resizes the text within an object to fit within a rectangle of a specified size. This is useful when the data that is contained in a paragraph is highly variable in length but must always fit within a certain area on the template. BarTender increases or decreases the font size of the text contents so that the text fits within the boundaries of the object.
|

|
When you click to select the Auto Size option, the settings for Point Size override the settings that are configured on the Font property page.
|
-
Font Point Size: Specifies the Minimum and Maximum point size. You can use this option to ensure that the text will never be too small or large. If you want the font to stay at a fixed height, set both Minimum and Maximum to the same value.
-
Object Size: Specifies the height of the text object or of the human-readable characters of a barcode object.
-
Alignment: Specifies the vertical alignment of the text within the object if it does not completely fill the height of the object.
|

|
If data for the object is ever too long to fit within the rectangle at the minimum point size, BarTender truncates the text.
|
The Tabs tab enables you to set tab stops for the paragraph. Tab stops define where your cursor stops when you press the Tab key on your keyboard or insert an <HT> character from the Insert Symbols or Special Characters dialog.
-
Tab Stops: Enables you to set tab stops in the selected object.
-
Default Tab Stops: Specifies the distance between tab stops and between the margin and the first tab stop.
-
Custom: Enables you to add custom tab stops in addition to the default. To add a tab stop, enter a value in the Custom field, and then click Set. To remove a tab stop, select the tab stop, and then click Delete. To remove all custom tab stops, click Delete All.
The Spacing tab enables you to specify the vertical spacing between the lines in a paragraph and between paragraphs within a single object.
-
Line Spacing: Specifies the vertical distance between the lines in a paragraph. Options include:
-
Single: Uses the line spacing value that is reported by the selected font, which is typically slightly larger than the font point size. If any data sources have different font sizes, the largest size is used to configure the line spacing.
-
1.5 Lines: Uses one and a half times the size of single line spacing.
-
Double: Uses twice the size of single line spacing.
-
Triple: Uses three times the size of single line spacing.
-
Multiple: Uses the specified value as the amount of space between lines in a paragraph. For example, a value of 1.75 increases the single line spacing by 75 percent (one and three quarters times the size of single line spacing).
-
Uppercase: Sets the line spacing to a value that is appropriate for text that contains only uppercase characters.
-
At Least: Uses single line spacing if the specified value is less than the single line spacing value; otherwise, uses the specified value.
-
Exactly: Specifies a fixed line spacing amount in points. For example, a value of 14.0 pt will specify a line spacing of a 14-point font size.
-
Before Paragraph: Specifies the amount of space above the paragraph, measured in lines or points.
-
After Paragraph: Specifies the amount of space below the paragraph, measured in lines or points.
|

|
The distance between two paragraphs will be the sum of the Before Paragraph and After Paragraph values.
|
-
Reading Order: Specifies the reading order for the object. Set this to Auto to use the reading order of the script that is identified on the Advanced tab of the Font property page. If you select a reading order that is not supported by the selected script, BarTender treats the text as directionally mixed.


 Opens the
