To configure font options such as bold, italics, typeface, and type size, refer to the Font Property Page.
Text Format Property Page |
Use the Text Format property page of your text and barcode objects to configure text formatting options, including text wrapping, indentation and spacing, tab stops, columns, and reading order. In the case of barcode objects, the formatting that you apply here affects the human readable characters.
|
|
To configure font options such as bold, italics, typeface, and type size, refer to the Font Property Page. |
You can access the Text Format property page by using one of the following methods:
In the left navigation pane of the Text Properties dialog, click Text Format.
In the left navigation pane of the Barcode Properties dialog, click Text Format.
The text format options are organized on the property page by tabs. The tabs that are available depend on whether you are configuring a barcode object or a text object. Transform-specific tabs are available only when you configure a text object and select a transform for the object.
|
|
Text transforms are automatically applied to the text object when you add a predefined transformed text object from the object toolbar. For more information about the different types of text objects and transforms, refer to Types of Text Objects. |
The following options and tabs are available on the page:
Transform: Specifies the type of transform that you want to be applied to the text object. Text transforms are not available for barcode objects.
Sample: Displays sample text that reflects the formatting that you apply.
The Text Format property page includes the following default tabs.
Use the Wrap tab to set text wrapping and alignment options for the selected object.
|
|
This tab is available for all text object transform types except arc. |
The following options are available:
Wrap to fit width: Specifies that the text wraps to fit a width that you specify. No additional options are available on this page until you select this option.
Width: Specifies the width that you want the text to fit within.
Click  to open the Wrap Width dialog, where you specify the paragraph width behavior of the selected object.
Alignment: Specifies the alignment of the text in the paragraph, as follows:
Left: The text is aligned along the left margin, and the right edge of the paragraph is uneven.
Center: Each line of text in the paragraph is centered within the object so that both the left and right edges of the paragraph are uneven.
Right: The text is aligned along the right margin, and the left edge of the paragraph is uneven.
Justified: The spaces between the words of each line in the paragraph are adjusted so that the paragraph is aligned along both the left and right edges. The alignment of the last line of the paragraph is specified in the Orphan Alignment option.
Distributed: The spaces between characters of each line in the paragraph are adjusted so that the paragraph is aligned along both the left and right edges. The alignment of the last line of the paragraph is specified in the Orphan Alignment option.
Orphan Alignment: Specifies the alignment of the last line in a paragraph when you select either Justified or Distributed alignment for the paragraph. When you select Distributed alignment, the orphan alignment setting is used only when the last line contains a single word.
Wrap to borders of other objects: Specifies that the text wraps when it reaches the border of another object that intersects it. Depending on the size and position of the text object, the text wraps either around or within the other object. For more information, refer to Text Wrapping Examples.
|
|
The text that is contained in the text object will wrap around or within other objects only when those objects are behind the text object in the z-order. To move the text object to the front of the z-order, right-click the text object, point to Arrange, point to Order, and then click Bring to Front. |
Wrap Method: Specifies the wrap method that you want to apply to the text. The default method is Smart, and in most cases this method correctly wraps the text around or within any objects that intersect it. The other methods are for specific scenarios in which Smart does not produce the effect that you want. The following wrap methods are available:
Smart: BarTender tries to determine how text should wrap when an object intersects it. Either the text automatically wraps outside and to the left or right of the intersecting object or it wraps between the intersecting object's boundaries. It is possible for text to simultaneously fit inside one or more larger objects and wrap around one or more smaller objects by using this method.
Inside: The object's text appears inside the boundary of the intersecting object. No text appears unless it is inside the boundaries of at least one object. If there are multiple objects on the template, the text appears within the union of the boundaries of all objects.
Outside (Tight): Text appears to the left and right of any object that intersects it. If there are multiple objects that are arranged horizontally with space between them, text can also appear between the objects.
Outside (Box): Text behaves the same way as it does when Outside (Tight) is used, except that the bounds of the object are treated as rectangular.
Above and Below: Text appears only above and below objects. It does not appear as partial lines to the left or right of intersecting objects. If there are multiple objects that are arranged vertically with space between them, text can appear in that space.
Left and Right Sides: Text appears to the left and right of any object that intersects it. If there are multiple objects that are arranged horizontally with space between them, text does not appear between them.
Left Side: Text appears to the left of any object that intersects it. If multiple objects are encountered within one line, text wraps to the left of the first object that intersects it.
Right Side: Text appears to the right of any object that intersects it. If multiple objects are encountered within one line, text wraps to the right of the first object that intersects it.
Largest Side: Text appears to the left or right of the object that intersects it, in whichever space is larger.
Between: If there are multiple intersecting objects that are arranged horizontally with space between them, text appears between the objects. If there are only two objects, text behaves the same way it does when Largest Side is used.
Horizontal Padding: Specifies the amount of padding that you want to appear between the text and the horizontal edges of an object that intersects it.
Vertical Padding: Specifies the amount of padding that you want to appear between the text and the vertical edges of an object that intersects it.
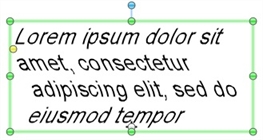
Use the Indentation and Spacing tab to specify the paragraph indentation and line spacing for text format types that support multiple lines of text.
|
|
This tab is available only when you select Wrap to fit width on the Wrap tab or when you select Wrap to Fit on the Arc tab. |
The following options are available:
Indentation: Specifies indentation settings for paragraphs within the object, as follows:
(none): No indentation is applied to paragraphs.
First Line: For each paragraph, the first line is indented the specified distance.
Hanging: For each paragraph, all lines but the first are indented the specified distance.
Line Spacing: Specifies the vertical distance between the lines in a paragraph, as follows:
Single: Uses the line spacing value that is reported by the selected font, which is typically slightly larger than the font point size. If any data sources have different font sizes, the largest size is used to determine the line spacing.
1.5 Lines: Uses one and a half times the size of single-line spacing.
Double: Uses twice the size of single-line spacing.
Triple: Uses three times the size of single-line spacing.
Multiple: Uses the specified value as the amount of space between lines in a paragraph. For example, a value of 1.75 increases the single-line spacing by 75 percent (one and three quarters times the size of single-line spacing).
Uppercase: Sets the line spacing to a value that is appropriate for text that contains only uppercase characters.
At Least: Uses single-line spacing if the specified value is less than the single-line spacing value; otherwise, uses the specified value.
Exactly: Specifies a fixed line spacing amount in points. For example, a value of 14.0 pt specifies a line spacing of a 14-point font size.
Before Paragraph: Specifies the amount of space above the paragraph, measured in lines or points.
After Paragraph: Specifies the amount of space below the paragraph, measured in lines or points.
|
|
The distance between two paragraphs is the sum of the Before Paragraph and After Paragraph values. |
Use the Tabs tab to set tab stops for the line or paragraph of text. Tab stops define where the cursor stops when you press the Tab key on your keyboard or insert an <HT> character from the Insert Symbols or Special Characters dialog.
The following options are available:
Default Tab Stops: Specifies the distance between tab stops and between the margin and the first tab stop.
Tab Stop Position: Specifies custom tab stops that you can select to override the default tab stop. To create new tab stops, enter the value that you want, and then click Add.
Alignment: Specifies the alignment for the selected custom tab stop, as follows:
Auto: Aligns the tab stop on the left for languages that have a left-to-right reading order or on the right for languages that have a right-to-left reading order. For more information, refer to Specifying Reading Order.
Left: Aligns the tab stop from the left side of the object.
Center: Aligns the tab stop from the center of the object.
Right: Aligns the tab stop from the right side of the object.
Decimal: Aligns the tab stop over the decimal character.
Character: Aligns the tab stop to a specified character. Enter the character that you want, or select one of the preset characters, which are colon (:), hyphen (-), equal sign (=), slash mark (/), or backslash (\).
Leader: Specifies a leading value for the selected tab stop.
Add: Adds a tab stop that you have specified in the Tab Stop Position field.
Move: Updates the position of an existing tab stop. This action is available if you select a tab stop from the list and then enter a value in Tab Stop Position that does not correspond to an existing tab. The tab stop position is updated while its existing alignment and leader are kept.
Clear: Clears the selected custom tab stop.
Clear All: Clears all custom tab stops.
Use the Layout tab to specify the height, number of columns, column spacing, and reading order for the selected text.
The following options are available:
Automatically adjust height: Specifies that BarTender automatically adjusts the height of the text object to fit the text inside it. Available only with wrapped text objects when Automatically fit text to specified dimensions is not selected on the Auto Fit property page.
Height: Specifies a height for a wrapped text object. Text that does not fit within the specified object height is clipped. Not available when you select Automatically adjust height.
Columns: Specifies the number of columns that you want to appear in the text object. Enter the number that you want. Alternatively, use the arrows to specify the number of columns.
Column Spacing: Specifies the spacing width between columns. Available when two or more columns are specified.
Columns are positioned according to reading order. If reading order is set for left-to-right, the first column is on the left. If reading order is set for right-to-left, the first column is on the right. For more information, refer to Specifying Reading Order.
Reading Order: Specifies reading order for the selected object, as follows:
Auto: BarTender automatically sets the reading order for the object based on the language script that is selected for the Script option on the Advanced tab of the Font property page.
Left-to-Right: Specifies that the object's reading order is from left to right, which is common in most Western languages such as English. If the line of text includes text from both right-to-left and left-to-right reading languages, the text is treated as directionally mixed.
Right-to-Left: Specifies that the object's reading order is from right to left, which is common in some Eastern languages such as Japanese. If the line of text includes text from both right-to-left and left-to-right reading languages, the text is treated as directionally mixed.
The following tabs are available on the property page when you select the corresponding transform for a text object.
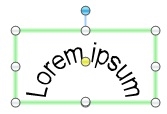
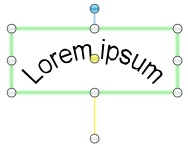
When you select the arc transform for a text object, you can use the Arc tab to set the alignment, amount of curvature, and angle of the text.
|
|
You can also drag the yellow sizing handles to adjust the appearance of the text object. |
The following options are available on the Arc tab:
Center Point: Specifies the point around which the arc text is curved and from which the Radius distance is measured. The curvature of the text is determined by the distance (the radius) that the text is from the center point; therefore, the closer the text is to the center point, the more curved it will be. The following options are available:
Use Center of Template: Specifies that the radius is measured from the center of the template.
Freeform: Specifies that the radius is measured from the coordinates of the object's center point. To specify this point, use the mouse to move the object, or define the position by using the Position property page.
Radius: Adjusts the curvature of the text by specifying the distance between the center point and the text. The curvature of the text is determined by the radius; therefore, the closer the text is to the center point, the more curved it will be, as shown in the following illustrations.
| 0.1 inches | 0.25 inches | 0.5 inches |

|
|
|
Reference Angle: Specifies the angle by which to rotate the text around the center point.
Wrap to Fit: Specifies that the text wraps within the arc object when the line of text exceeds the angle degree that is specified. Use the field to the right of the Wrap to Fit check box to enter the degree value that you want. Alternatively, you can select a preset degree value from the field.
Direction: Specifies the direction in which the text arcs around the center point, as follows:
Auto: Specifies that the text orientation is chosen based on the selected alignment and reference angle. The text orientation depends on whether each range includes or excludes 90 degrees and 270 degrees. At the 90 degree reference angle, "left" is in the top half of the circle, and "right" is in the bottom half. Text that is primarily in the top half is displayed as clockwise, and text that is primarily in the bottom half is displayed as counterclockwise. If the range is indeterminate, the default is clockwise.
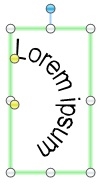
Clockwise: Specifies that the bottom of the text line or paragraph arcs around the center point so that the text reads in a clockwise direction.
Counterclockwise: Specifies that the top of the text line or paragraph arcs around the center point so that the text reads in a counterclockwise direction.
Alignment: Specifies the alignment of the text within the arc, as follows:
Left: The left edge of the text aligns with the outer edge of the arc and the right edge of the text is uneven.
Center: The text is centered within the arc.
Right: The right edge of the text aligns with the outer edge of the arc and the left edge of the text is uneven.
| Left | Center | Right |
|
|
|
Justified: The spaces between words of each line in the paragraph are adjusted so that the paragraph is aligned along both the left and right edges. The alignment of the last line of the paragraph is specified in the Orphan Alignment option. Available when you select Wrap to Fit.
Distributed: The spaces between the characters of each line in the paragraph are adjusted so that the paragraph is aligned along both the left and right edges. The alignment of the last line of the paragraph is specified in the Orphan Alignment option. Available when you select Wrap to Fit.
Orphan Alignment: Specifies the alignment of the last line in a paragraph when you select either Justified or Distributed alignment for the paragraph. When you select Distributed alignment, the orphan alignment setting is used only when the last line contains a single word.
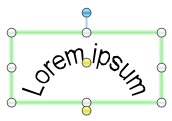
When you select the bend transform for a text object, you can use the Bend tab to specify the direction, side movement, and perspective effect for the text.
|
|
You can also drag the yellow sizing handles to adjust the appearance of the text object. |
This transform behaves like a skew transform that slants text in two directions; the slant effect stops at the middle of the text and then reverses direction, making the text symmetrical.
The following examples show some basic settings for the transform. These examples have been additionally manipulated by dragging the object's yellow sizing handles for different visual effects.
| Vertical, Same Direction |
Vertical, Opposite Directions |
Vertical, Independent |
|
|
|
|
|
This effect is sometimes called a chevron, but you can create other effects with it. For more information, refer to Bend and Skew Text Examples. |
The following options are available on the Bend tab:
Bend Direction: Specifies the direction of the angle for the bend transform: vertical or horizontal.
Side Movement: Specifies the side movement for the text, as follows:
Same Direction: Specifies that the characters within the line of text remain equal in size from the beginning of the text to the end.
Opposite Directions: Specifies that the top and bottom of the text are skewed in equal but opposite directions.
Independent: Specifies that the top and bottom of the text can be skewed independently from one another. When this option is selected, there are separate sizing handles for the top and bottom of the text when the object is selected on the template.
Perspective effect: Specifies that when text is compressed or stretched vertically, it is also compressed or stretched horizontally (and vice versa). This gives the text the appearance of moving farther away. Available when Side Movement is set to Opposite Directions or Independent.
|
|
To adjust the degree of side movement of a selected bend text object, drag the yellow sizing handle to adjust the appearance. Objects that have a Side Movement setting of Independent have two sizing handles, because the degree of bend for the top and bottom or left and right of the text line can be controlled independently. You can use the options of the bend text object to create various text effects. For more information, refer to Bend and Skew Text Examples. |
When you select the curve transform for a text object, you can use the Curve tab to specify the direction, side movement, and perspective effect for the text.
|
|
You can also drag the yellow sizing handles to adjust the appearance of the text object. |
The following examples show some basic settings for the transform. These examples have been additionally manipulated by dragging the object's yellow sizing handles for different visual effects.
| Vertical, Same Direction |
Vertical, Opposite Directions |
Vertical, Independent |
|
|
|
The following options are available on the Curve tab:
Curve Direction: Specifies the direction of the curve transform: vertical or horizontal.
Side Movement: Specifies the side movement for the text, as follows:
Same Direction: Specifies that the characters within the line of text remain equal in size from the beginning of the text to the end.
Opposite Directions: Specifies that the top and bottom of the text are skewed in equal but opposite directions.
Independent: Specifies that the top and bottom of the text can be skewed independently from one another. When you select this option, there are separate sizing handles for the top and bottom of the text when the object is selected on the template.
Perspective effect: Specifies that when text is compressed or stretched vertically, it is also compressed or stretched horizontally (and vice versa). This gives the text the appearance of moving farther away. Available when Side Movement is set to Opposite Directions or Independent.
|
|
To adjust the degree of side movement of a selected curve text object, drag the yellow sizing handle to adjust the appearance. Objects that have a Side Movement setting of Independent have two sizing handles, because the degree of curve for the top and bottom or left and right of the text line can be controlled independently. |
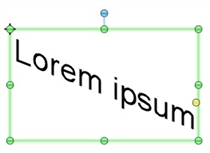
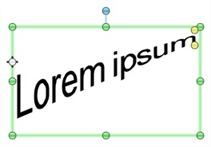
When you select the skew transform, you can use the Skew tab to specify the direction, movement, and perspective effect for the text.
|
|
You can also drag the yellow sizing handles to adjust the appearance of the text object. |
The following examples show some basic settings for the transform. These examples have been additionally manipulated by dragging the object's yellow sizing handles for different visual effects.
| Vertical, Same Direction |
Vertical, Opposite Directions |
Vertical, Independent |
|
|
|
The following options are available on the Skew tab:
Skew Direction: Specifies the direction of the skew transform: vertical or horizontal.
Side Movement: Specifies the side movement for the text, as follows:
Same Direction: Specifies that the characters within the line of text remain equal in size from the beginning of the text to the end.
Opposite Directions: Specifies that the top and bottom of the text are skewed in equal but opposite directions.
Independent: Specifies that the top and bottom of the text can be skewed independently from one another. When you select this option, there are separate sizing handles for the top and bottom of the text when the object is selected on the template.
Perspective effect: Specifies that when text is compressed or stretched vertically, it is also compressed or stretched horizontally (and vice versa). This gives the text the appearance of moving farther away. Available when Side Movement is set to Opposite Directions or Independent.
|
|
To adjust the degree of side movement of a selected skew text object, drag the yellow sizing handle to adjust the appearance. Objects that have a Side Movement of Independent have two sizing handles, because the degree of skew for the top and bottom or left and right of the text line can be controlled independently. You can use the options of the skew text object to create various text effects. For more information, refer to Bend and Skew Text Examples. |
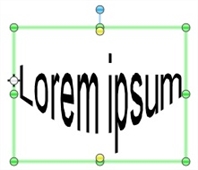
When you select the wave transform, you can use the Wave tab to specify the number of waves that appear in the text and the wave direction.
|
|
You can also drag the yellow sizing handles to adjust the appearance of the text object. |
The following examples show some basic settings for the transform.
| Five Waves, Vertical Wave Direction |
Two Waves, Horizontal Wave Direction |

|
|
The following options are available on the Wave tab:
Number of Waves: Specifies the number of waves that appear in the text.
Wave Direction: Specifies the direction of the waves: vertical or horizontal.
Related Topics