Open topic with navigation
You can create sophisticated text effects by using bend and skew text object transforms.
Bend Transform Example
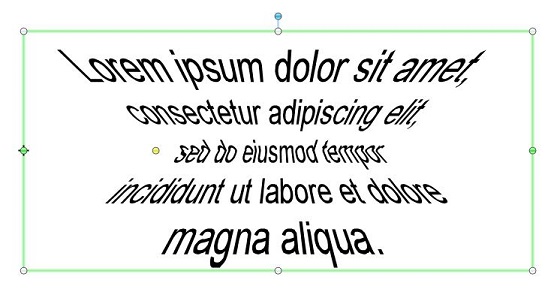
The following example shows an effect that was made by using a Bend text object. In this configuration, you set the following options on the Text Format property page:
-
On the Wrap tab:
-
On the Bend tab:
-
Set Bend Direction to Horizontal.
-
Set Side Movement to Opposite Directions.
-
Click to select the Perspective effect check box.
 To add a Bend text object to your template
-
On the Create menu, click Text, and then click Bend Up  or Bend Down
  .
.
-
Click the location on the where you want to place the Bend text object.
-
Double-click the text object to open the Text Properties dialog.
-
On the Bend tab of the Text Format property page, configure the following settings:
-
Set the Bend Direction property to Horizontal.
-
Set the Side Movement property to Opposite Directions.
-
Click to select the Perspective effect check box.
-
On the Wrap tab of the Text Format property page, click to select the Wrap to fit width check box, and make sure that the Alignment option is set to Center. Configure the other properties as needed.
-
Click Close to close the Text Properties dialog.
-
Drag the yellow sizing handle, which is located in the middle left of the object, until the text appears the way that you want it.
Skew Transform Example
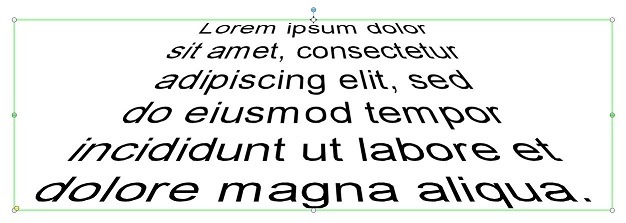
The following example shows a preset Fade Back text object configuration. In this configuration, the following options are set by default on the Text Format property page:
-
On the Wrap tab:
-
On the Skew tab:
-
Skew Direction is set to Horizontal.
-
Side Movement is set to Opposite Directions.
-
Perspective effect is selected.
To add a Fade Back text object to your template
-
On the Create menu, click Text, and then click Fade Back  .
.
-
Click the location on the template where you want to place the Fade Back text object.
-
Double-click the text object to open the Text Properties dialog, and then configure the object properties as needed.
-
Click Close to close the Text Properties dialog.
-
Drag the yellow sizing handle, which is located in the lower left corner of the object, until the text appears the way that you want it.
Related Topics