Creating and Modifying Intelligent Forms
You can create or modify intelligent forms and attach them to existing BarTender Cloud label files.
Creating a New Form
-
Click
 to open the BarTender Cloud menu, then click Librarian. Alternatively, you can click the Librarian button on the Home page.
 -
Click New, then select Intelligent Form.
-
In the New Intelligent Form dialog, enter a name for the new file

Files created using the Intelligent Forms Builder have a .btf extension and display this icon:
 .
. -
Click Design.
The Intelligent Form Builder page opens with a generic form available to work with.
-
On the Controls tab of the Components panel, drag the controls you want to use onto the form.
-
On the Attributes tab of the Properties panel, enter the attributes of the control you just positioned.
These attributes can include:
-
Component Name
-
Default Value
-
Data Type
-
Label
-
Link
-
Replace Image
Different components can have different tabs that let you control different aspects of the component. For example:
- Attributes: Enables you to define the component's properties.
- Options: Enables you to add things like entries on a dropdown list or items in a radio button group.
- Layout: Enables you to define the component's appearance on the form.
- Style: Enables you to control how text appears on the control.
-
-
On the Content tab of the Components panel, control the design of the form.
-
Image: Enables you to add an image to the form. Any image on a form is not printed on the label.
-
Headline. Enables you to add a title to the form.
-
Paragraph. Enables you to add explanatory or informational text to the form.
-
Link. Enables you to add an external link to the form.
-
Separator. Enables you to include a separator, either a space or a line, to group controls on the form.
-
-
In the Label Templates panel, click Link a Label File to open the Link Label Template dialog where you can link one or more template files to the current form.
When these templates are printed, the form automatically loads enabling the print operator to enter information for the label.

You must link at least one template file that includes at least one variable to the form before you can save it.
-
Click Save to save the form.
A form page can have one or two columns on it. These columns can be of equal width, or one column can be wider than the other.
-
On the Intelligent Form Builder page, click the page's tab.
-
On the Attributes tab of the Properties panel, enter a name for the form. Optional.
-
In the Columns section on the Layouts tab, specify how many columns the page has.
-
 : Select to display only one column on the page.
 -
 : Select to display two columns on the page.
-
-
If you selected two columns, specify how the columns are formatted in the Columns Layout section.
-
: Select to display columns of equal width.
-
 : Select to display a thinner column on the left side of the form.
 -
 : Select to display a thinner column on the right side of the form.
-
-
Drag items from the Components panel and place them on the form, then define the parameters of the component.
The components in one column are completely independent of the components in the other column. You must fill each column separately; however, you can drag existing components from one column to the other.
-
Click Save.
Columns are set for individual pages so a form can use both single and multi-column pages.
You can create and manage multiple pages within a form so that longer forms can be divided into logical, step-based sections. You can have up to five pages in a form.
-
On the Intelligent Form Builder page, click New Page.
Intelligent Forms adds a new blank page to the current form and places it as the last page in the series.
-
If necessary, click the page's tab and drag it to a new position.
-
Drag items from the Components panel and place them on the form, then define the parameters of the component.
-
If necessary, right-click the page's tab and choose Rename Page.
-
Enter a new name for the tab.
-
To display a progress indicator when printing forms with multiple pages, click the Display Progress Indicator in the Properties panel.
-
Click Save.
-
On the Intelligent Form Builder page, click Link a Label File to open Link Label Template dialog.
-
In the dialog, select the space containing the templates you want to link.
-
In the Files section, select the checkbox for the template or templates you want to link to the form.
-
Click Link Files.
 To link variables in a form and label
Currently the Intelligent Forms feature can only map named data sources. This will be expanded in later releases.
-
In the Label Templates panel of the Intelligent Form Builder page, click
 beside the label you want to map variables for.
The Configure Variable Mapping dialog opens. The Label Variables list contains the variables defined in the label. The Form Variables list contains the variables (components) defined in the form.
-
From the dropdown list under Form Variables, select the component you want to map to the corresponding label variable.
As the variables and components are linked, the Variables Mapped counter at the top of the dialog changes.
-
Repeat for each variable you want to link.
-
Click Save.
Once the components in a form have been linked to the variables in a template file, the icon for that link changes to
 .
.
Working with Conditional Components
Each component can only have one conditional rule defined for it. However, a page may have more than one component with a conditional rule attached.
Rules cannot be reciprocal. Two controls may not use each other as sources for their rules. When the first control defines the second as its source and the second control attempts to select the first as its source, the first control is missing from the top dropdown in the {Type} Rule dialog for the second control and cannot be selected.
A component may also be the source of more than one conditional rule. For example, two controls can each have visible rules defined to hide them when Option 1 of a radio button group (the source of the rules) is selected.
To add a conditional component to a form
-
On the Intelligent Form Builder page, select a control on the form or drag a new control onto the form.
This is the component whose attribute will be manipulated by the rule defined below.
-
In the properties panel for that control, select
 beside the attribute for which you want to define a conditional rule.
There are three attributes that can become conditional:
-
Enabled
-
Required
-
Visible
When the source component's conditions for the defined rule are met, the control's attribute is changed by the rule.
-
-
In the top dropdown on {Type} Rule dialog, select the control whose behavior will determine when the attribute is manipulated. For example, RadioGroup1.
If a component is marked as Required, it is not possible to use that component in a conditional rule.
-
In the second dropdown, specify the condition of that control that will trigger the attribute. For example, equals.
-
If necessary, in the third dropdown, specify the value or option that will trigger the attribute. For example, Agree.
-
Click Save.
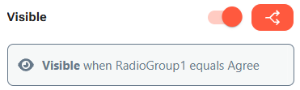
The Intelligent Form Builder displays a message below the attribute affected by the rule describing the rule.
|
|
Two or more components may have a rule that is triggered by the same control/condition/option combination. However, these rules must be defined separately for each component attribute that is affected. |
-
Select the control the contains the conditional rule.
-
Click
 beside the attribute that has a rule defined for it.
 -
Select a new item from one or more of the dropdowns.
You can select a new control, condition, and option for the rule.
-
Click Save.
To remove a condition from an attribute
Since a component can only have one conditional rule, you can remove a condition from an attribute either because you want to make a different attribute on the control conditional or because you want to remove one or more conditions from a form.
-
Select the control the contains the conditional rule.
-
Click
beside the attribute that has a rule defined for it. -
On the {Type} Rule dialog, click Remove.
Modifying Forms
-
Click
to open the BarTender Cloud menu, then click Librarian. Alternatively, you can click the Librarian button on the Home page. -
In Librarian, select the file you want to edit, click
 , and select Design.
The Intelligent Form Builder page opens with the selected file displayed.
-
On the displayed form, select any controls or content you want to remove, then press the Delete key.
-
On the Controls tab of the Components panel, select the control you want to add and drag it onto the form.
-
On the Content tab of the Components panel, select the content item you want to add and drag it onto the form.
-
In the Properties panel, enter or modify the attributes of the component you just positioned.
-
To edit an existing control, select it on the form.
-
On the Attributes tab of the Properties panel, enter or modify the attributes of the control you selected.
-
On the Options tab (if available), add or remove any additional options.
-
On the Style tab, enter or modify the attributes of the control you selected.
-
-
In the Label Templates panel, click Link a Label File to open the Link Label Template dialog where you can add or removed links to one or more template files.
-
Click Save to save the form.
-
In the Label Templates panel of the Intelligent Form Builder page, click
 beside the label you want to unlink from the current form.
Publishing a Form
For users to be able to use a form, the status of the form must be Live in Production.
-
In the header bar on the Intelligent Form Builder page, click
 , then select Mark as live.
The Intelligent Forms Builder saves the file and changes the status from Not in Production to Live in Production.
To remove a form from production
A live (published) form can be removed from production at any time.
-
In the header bar on the Intelligent Form Builder page, click
, then select Remove from production.The status changes from Live in Production to Not in Production and the form is no longer available.
Related topics
- Using the Intelligent Forms Designer
- Using External Data Sets
- Adding the Record Picker to an Intelligent Form
- Printing with Intelligent Forms