Importing the Plugin Code
|
|
Connect to the repository in the systems of your 3-system landscape in the following sequence: development, test, and production systems. |

Description
The following procedure describes the process for connecting to the repository on one system, here JXZ.
Procedure
-
Go to the BarTender Customer Portal
 .
. -
In the BarTender Download Center, click Downloads.
-
On the Download BarTender Cloud Tools page, click Download SAP Connector to download the zip file.
-
Go to the destination folder (usually Downloads), unzip the download, and upload the reference code to your Git repository.
-
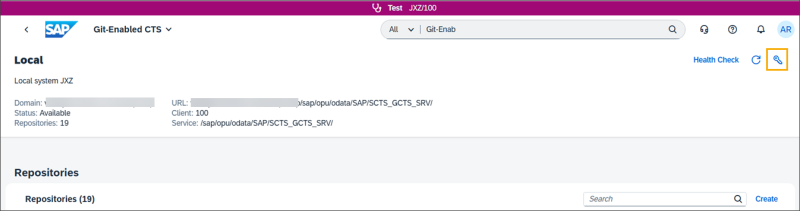
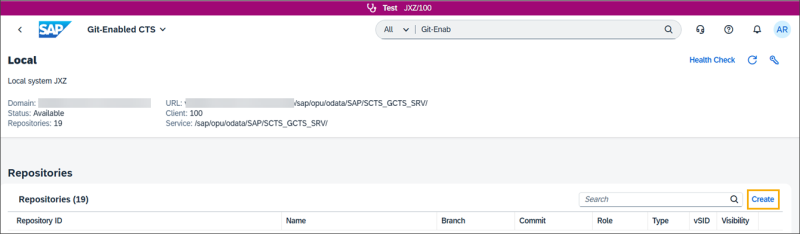
In the SAP Fiori launchpad of your SAP S/4HANA Cloud Public Edition development system, search for the app called Git-Enabled CTS. To open the gCTS app, select the Git-Enabled CTS tile.
-
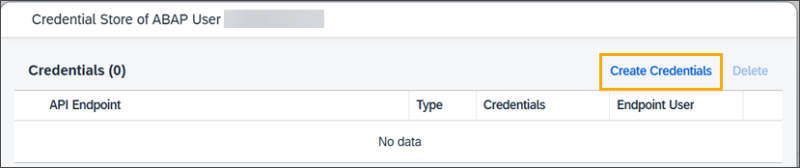
Click the key icon (Manage settings of current user) to provide credentials for the Git provider of the repository containing the extension.
-
Click Create Credentials.
-
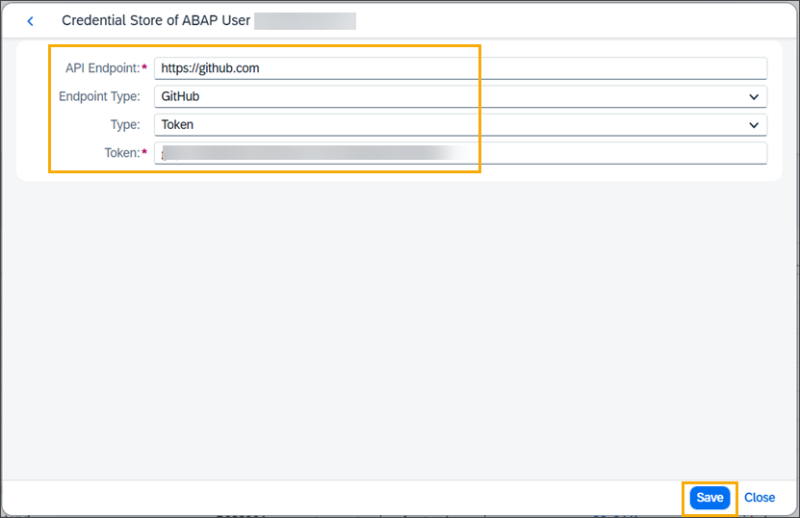
Enter the information as shown below, including the token provided to you by Seagull Software, then click Save.
-
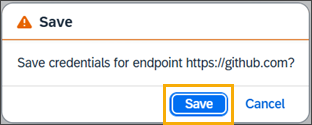
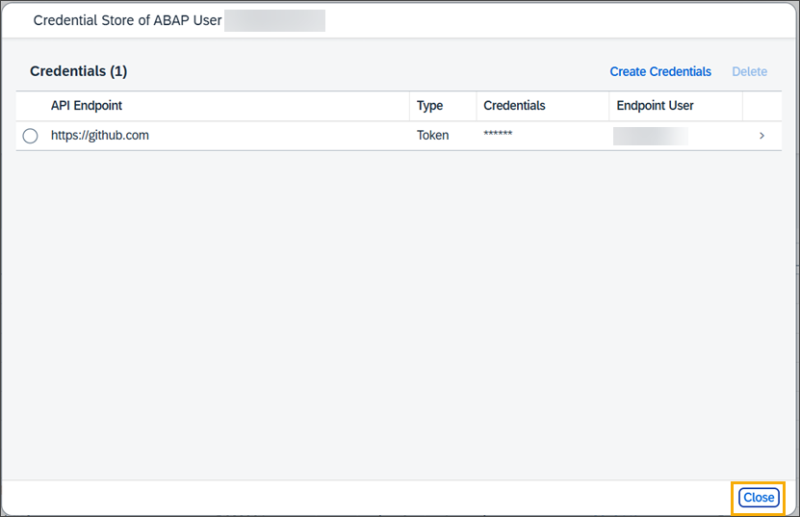
Click Save to confirm you want to save the credentials.
-
Click Close if gCTS can validate the authentication of the specified user. The Git user name displays in the Endpoint User column.
-
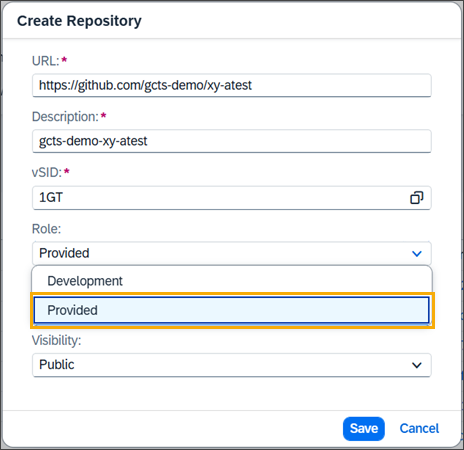
In the gCTS app, click Create.
-
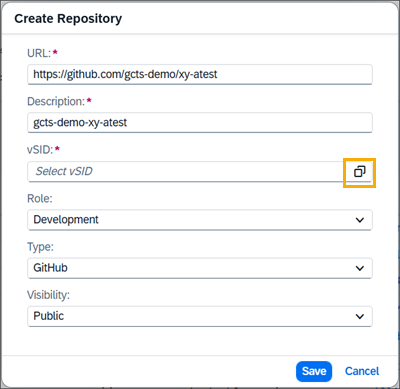
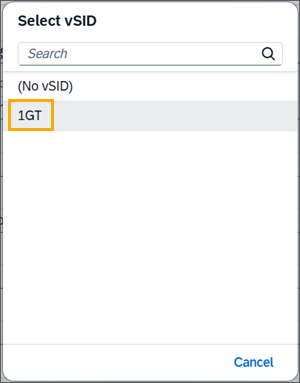
Enter the URL of the repository and select the value help in the vSID field. The Description is derived from the URL.
-
Select 1GT.
-
Select Provided as the Role of the repository.

It is important that you select the Provided role to be able to pull changes from remote.
-
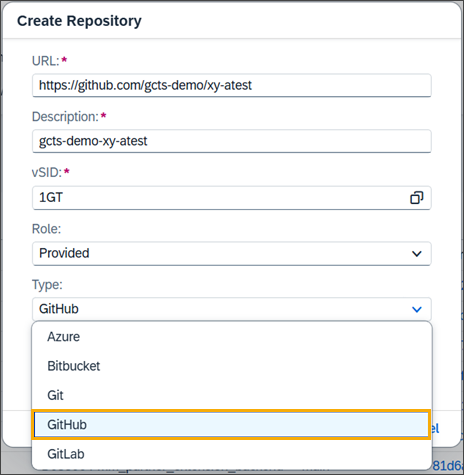
Select the correct Type.
-
Leave the Visibility setting as Public, and click Save.
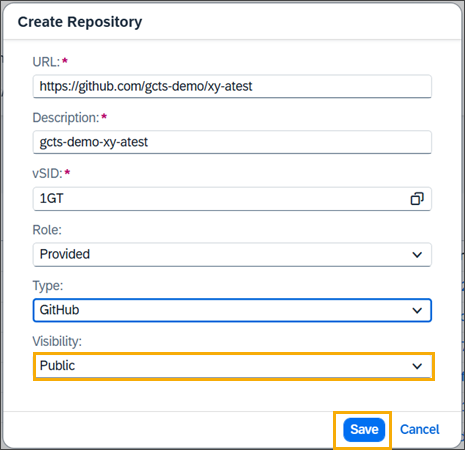
This setting defines the visibility in your system and doesn't impact the visibility of the remote repository. If you need to set the Visibility to Private, you can do so by editing the repository after you finish the creation process. If you set the Visibility to Private and other users need access, you will need to add collaborators to the repository in the gCTS app.
The gCTS app now displays the repository view of your new repository in the CREATED status.

-
To finalize the connection with your remote repository, click Clone Repository.

-
Click Clone to confirm that you want to clone the repository.
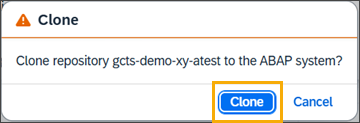
Cloning pulls the commits of the repository to the local repository and imports the objects to the ABAP system.
When the cloning process is completed, verify that the status of the repository is READY, the expected branch (most likely main) is set as the active branch, and the latest commit of this branch is active.
If everything works correctly in the development system, repeat the previous steps on your test system. Once the extension has been successfully cloned to the test system, you can continue with the production system.
You are now ready to use the extension.
|
|
When you clone a repository or pull a commit of a repository containing an SAP Fiori application to your system, all development objects of the app are imported. After the import, certain activation actions are performed, such as publishing the service binding. This process may take some time to complete. Seagull recommends that you wait for the activation process to finish before starting to test the app. |
|
|
Do not use ABAP development tools for Eclipse for manual actions, such as publishing the service binding. |