Authentication

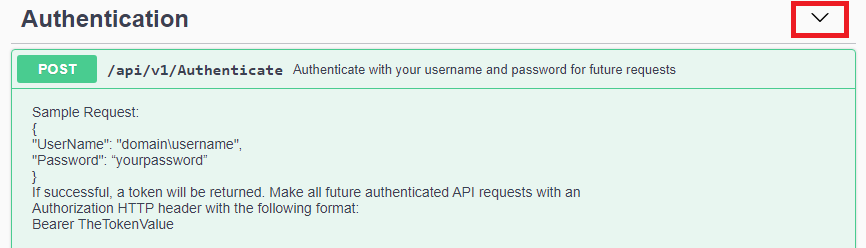
Print Portal can be configured with or without authentication required. When authenticate is enabled, before access to PrintPortal resources can be acquired, a request must originate from an authenticated user.

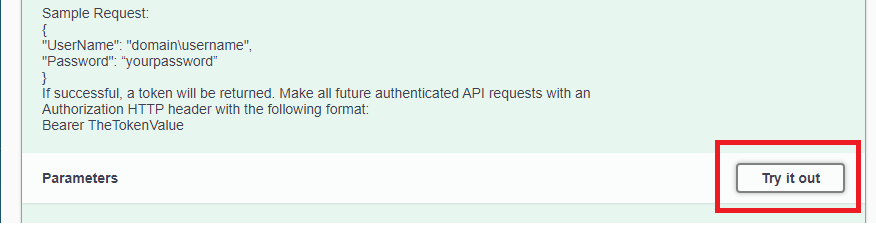
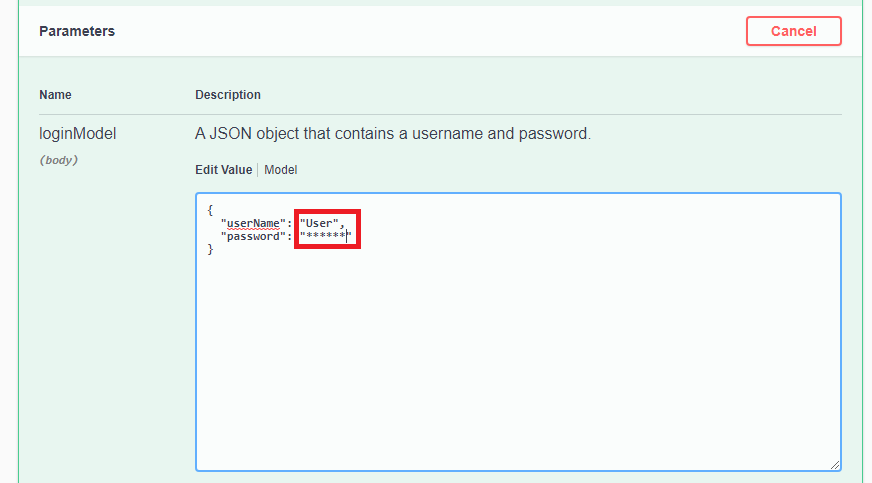
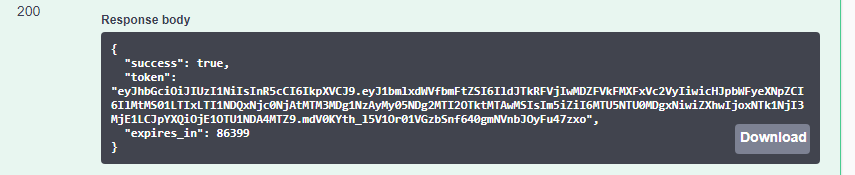
The following procedure explains how to send the authentication request. When Print Portal authentication is enabled and the correct user name and password are submitted, a success response is returned that includes the authentication token to use for future REST API calls.

ClosedTo send an authentication request

  1. Open the Print Portal Swagger user interface. To do this, add "/swagger/" to the URL for Print Portal, as follows:

    http://localhost/BarTender/swagger/

  2. Click Post for the top item, Authentication, to display the authentication requirements for the request.

  3. Click Try it out.

  4. Add your user name and password.

  5. Click Execute.

ClosedJavaScript Example

Copy
/*---------------------------------------------------------------------------------------------
Authenticate */

// This will allow the user to extract an authentication token

// Change the two variables to your credentials
let username = "domain\\username";
let password = "password";

// Change these to the URL
let basePrintPortalURL = "https://example.com/Bartender/";

// First step, authentication
fetch(basePrintPortalURL + 'Authenticate', {
  method: 'post',
  headers: {
    'Content-Type': 'application/json',
  },
  body: JSON.stringify({
            "username": username,
            "password": password
  })
               })
//The response will be a JSON object which contains a token and expiration
.then(response => response.json())

.then(result => {
  console.log('Success:', result);
  //If successful, a token will be returned as the result
  // Token will be used on the header of print call using the header 'Authorization': 'Bearer ' + token
})
.catch(error => {
  console.error("The user name or password provided is incorrect.");
});