
In the following images, the red boxes demonstrate the reference point options and are for visual aid only. They do not appear on the actual template or object.
Understanding Reference Points |
Reference points in
Precisely align and place objects on your template.
Precisely align and place controls on your data entry form.
Each object or control has a unique object reference point as well as a unique template reference point set separately from those of other objects or controls. For simplicity, the following discussion uses templates and objects to describe reference points, but all information is also relevant to data entry forms and controls.
|
|
In the following images, the red boxes demonstrate the reference point options and are for visual aid only. They do not appear on the actual template or object. |
The template reference point is any one of nine points on your design area that
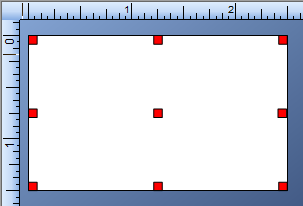
If the template is elliptical or has rounded corners, the nine possible reference points are the center and around the perimeter of an invisible rectangle whose lines intersect the template at its highest, lowest, rightmost, and leftmost points.
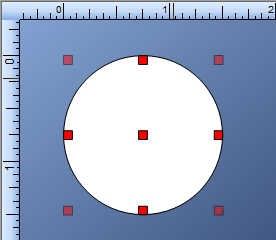
The object reference point is any one of nine points on your object that
|
|
Reference points for barcode objects do not include the human readable area. |
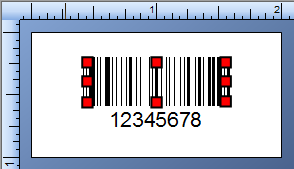
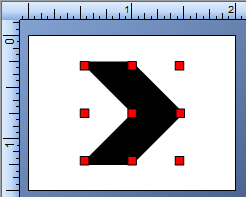
If the object is elliptical, has rounded corners, or is in a shape other than a rectangle, the nine possible reference points are the center and around the perimeter of an invisible rectangle whose lines intersect the object at its highest, lowest, rightmost, and leftmost points.
|
|
Using Snap to Object or Ruler to assist you in moving objects on your template can result in an object's reference point being reset. For more information, refer to Object Snapping. |
As noted above,
Negative values for the X and Y coordinates are supported. For more information about their impact on an object's position related to the template reference point, see the Position property page.
|
|
When you update reference points, |
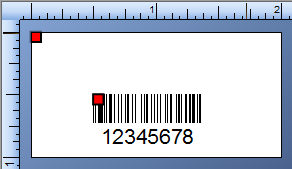
The following image shows a 1 x 2 inch template. The object's template reference point is Top Left and the object's reference point is Top Left. The object's X and Y coordinates are each set to 0.5 inches. Based on these settings, the object's reference point is placed downward 1/2 inch and rightward 1/2 inch from the template reference point (the upper left edge of the template).
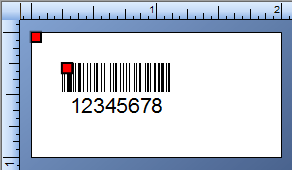
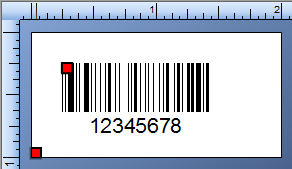
The following image shows the object placed at 1/4 inch from the top and left edge of the template. While there are numerous ways this can be achieved, either of the following would place the object in the desired location:
Change the object's X and Y coordinates to 0.25 inches each.
Change the object's template reference point to Bottom Left, keeping the X coordinate at 0.25 inches, and changing the Y coordinate to 0.75 inches.
|
|
The object reference point for a line object will always be the center point of the line. Also, you are not required to specify the position of a line in terms of the X and Y coordinates of the object reference point relative to the template reference point. You have the option of using the X and Y coordinates of one or the other end point of the line (relative to the template reference point). |